Monday 29 July 2013

Enabling BLOB cache in SharePoint 2013

Some features of SharePoint 2013 need to enable the BLOB cache in SharePoint 2013 like Image Renditions.
Will share the post about image renditions soon.
This is easy…
  1. Open the web.config of your SharePoint web application
  2. Search for <BlobCache
  3. You will find the following line
    <BlobCache location=C:\BlobCache\14“ path=\.gif|jpg|jpeg|jpe|jfif|bmp|dib|tif|tiff|themedbmp|themedcss|themedgif|
    themedjpg|themedpng|ico|png|wdp|hdp|css|js|asf|avi|flv|m4v|mov|mp3|mp4|mpeg|mpg|rm|rmvb|wma|wmv|ogg|ogv|oga|webm|xap)$“ maxSize=10“ enabled=false />
4.   Change the enabled=false to enabled=true

Friday 26 July 2013

Configuring my sites in SharePoint 2010 as well as 2013.

In this post we are going to discuss about how to configure the my sites from end to end. Each and every step will explain you clearly.

Before stepping into configuring my sites your environment should be fully configured with user profile service application. If you don't know the steps for configuring user profile service application please refer this link

Once user profile service is ready to use then why we need to wait lets go for configuring the my sites. The below steps are need to be done to achive the my sites configuration.

1. Web Application creation.
2. Site collection creation with My Site Host Template.
3. Setup mysites in User profile service application in SharePoint central administration.
4. Adding location as a wildcard inclusion in managed path of Web application.

Earlier i have post which explain about how to create web application and site collection in sharepoint using powershell command. So refer that to create those stuff. In site collection command you need to change the site collection template from blog to My site Host.

To go Web Application creation post please click here
To go Site Collection creation post please click here

In my scenario i created a web application in the port 4224 and site collection has been created in the ROOT with the template My Site Host.

After all the above stuff's go to user profile service application page in Central Administration -> Manage Service Application. Select the user profile service which you created and mapped with the web application.

Select setup my sites option in user profile service application like the below.


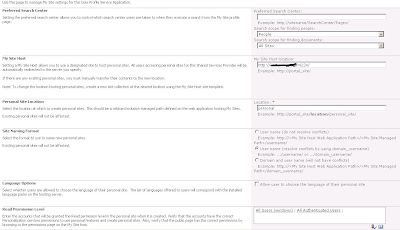
After selecting the above option it will open the page like below and update the information like below.


Once you updated the information click ok and  go to manage web applications page in central administration.

Select my site web application and choose managed path option. Then add the name as wildcard inclusion in managed path which you updated in location text box in setup my sites window.

Here i added personal as a wild card inclusion refer the below screen shot.


Once the managed path section then we need to enable the self site creation option in web application the below screen shot will explan the things.


Now we completed the mysite configuration. The big question is how to check the mysite in environment. who can we confirm whether the above effort are worth. Simple very simple task.

Select display name which showing in the right most top corner and select it. it will show the drop down box now you have option called "My site". Select it. It will redirect you to the web application which you created 10 mins before for my site.

If it is useful please respond the survey which available in right side of the post :-)
Thursday 25 July 2013

MSSQL query for changing recovery model of all the databases in a server.

The below SQL query will help you to change the recovery model of all the databases in the server.

Recently i noted one of my development server is having 160+ databases and it occupied more than 600 gig space in HDD.

In development box no need of transaction log backup and every day full backup maintenance plan is running.

tried to change all the database recovery model to SIMPLE from Full or BULK LOGGED and the below script helped me. Hope it will help me in after sometime as well as you.


declare
@dbnm sysname,
@sql varchar(100)


-- Declare begin cursor to get the database names and get info from sys.databases catalog

declare cursor_db cursor
for select name from sys.databases where name != 'tempdb'

-- Using a cursor to loop through database names and change recovery model

open cursor_db
fetch next from cursor_db into @dbnm

--While Loop with Alter database command

while @@fetch_status = 0

begin

--print 'database is ' + @dbnm

set @sql='alter database ' + @dbnm + ' set recovery simple'
print 'sql is ' + @sql
exec (@sql)


fetch next from cursor_db into @dbnm
end

--clean up objects

close cursor_db
deallocate cursor_db

Thanks.

Change the display name of SHAREPOINT\system


The below power shell script will change the display name of SHAREPOINT\system.

Recently we migrated one web application from MOSS 2007 to SharePoint 2013 and we realize the SHAREPOINT\system display name is configured with one associate name who administer the MOSS 2007 environment. Using the below we changed the display name from Associate name to SYSTEM ACCOUNT


For changing the display name of SharePoint\System

## get the default web app
$web = Get-SPWeb http://shivashankaran/sites/2007to2013
## get the user info list
$l = $web.Lists | where { $_.Title -eq "User Information List" }
## get the system account item
$i = $l.Items | where { $_["Account"] -eq "SHAREPOINT\system" }
## if executing this command executing from ps1 file then the below will write the list name where the account available
write-host $i
## update to a friendly name
$i["Title"] = "SYSTEM ACCOUNT"
## update e-mail address
$i["Work e-mail"] = "shivashankaran.sc@scs.com"
## update the item
$i.Update()

Thanks & Regards.

Creating site collection in SharePoint 2013 using PowerShell.


Earlier we discussed about creating web application in SharePoint 2013 using Power Shell.

This will explain more about creating site collection in SharePoint 2013 and SharePoint 2010 using Power Shell.

To get the Power Shell script for creating web application please click here


For creating Site Collection  in SP 2013

The first line Get-SPWebTemplate will display the list of  site templates code using that you can create your new site collection with the template. You need to mention the template code in the command of creation of site collection. Please refer the below screen shot for more info. This template will contain codes for SP2013 and SP 2010 as well.


Get-SPWebTemplate

$template = Get-SPWebTemplate "BLOG#0"
New-SPSite -Url "https://shivashankaran" -OwnerAlias "scs\shiva4224" -Template $template

Creating web application in SharePoint 2013 using PowerShell.


 In SharePoint 2013 we have only one option on authentication provider to create a web application.

Because in SP 2013 classic is no more only claims available. The below powershell command will help you on creating web application in SharePoint 2013. It will applicable on SharePoint 2010 as well.


For creating web application in SP 2013


$ap = New-SPAuthenticationProvider


New-SPWebApplication -Name "Shivashankaran" -Port 4224 -URL "https://shivashankaran" -ApplicationPool "SP2013AppPool" -ApplicationPoolAccount (Get-SPManagedAccount "SCS\SHIVA4224") –AuthenticationProvider $ap -SecureSocketsLayer


Change the above command as per your requirement and create a web application. Will share the next step of creating site collection in powershell soon.

Rescan Disk Option Greyed Out | New Disks Not visible on Disk management | Update-HostStorageCache

  Recently I have added several LUN from NetApp Storage to Hyper-V servers. But in the disk management I couldn't see those new LUN. Exi...